Physics and Collision Setup
To make sure your truck mod works properly with the physics engine, configure the TPL markup as follows:
- Mark bones with the Physics Body property.
- Mark meshes with the Physics Shape property.
- Connect bones using Constraints to prevent the model from falling apart under physics forces.
- Add bones to the collision group so they do not collide with each other.
The configuration is descirbed below.
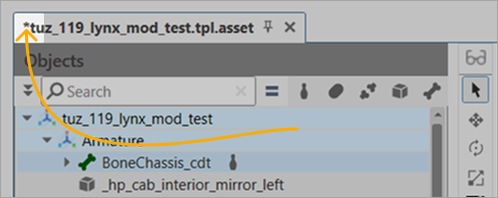
If your TPL file has unsaved changes, an asterisk is displayed next to the file name in the tab.
Physics Body and Physics Shape
To define physics bodies of your asset, mark the TPL objects with the following properties: Physics Body and Physics Shape.
- Physics Body — a logical description of a physics body's properties. This property can be assigned to any transform object in TPL. The position and orientation of this object will synchronize with the corresponding physics body's position according to the in-game simulation.
- Physics Shape — a TPL object's property that defines its geometry contributes to the shape description of the physics parent object. Physics Shape can be added only to TPL objects that have geometry and whose parent object has the Physics Body property.
Marking physics bodies
-
Mark all physical bones (with
*_cdtin their names) as physics bodies: select them in the Objects panel on the left and click Physics Body in the Object Markup panel on the right.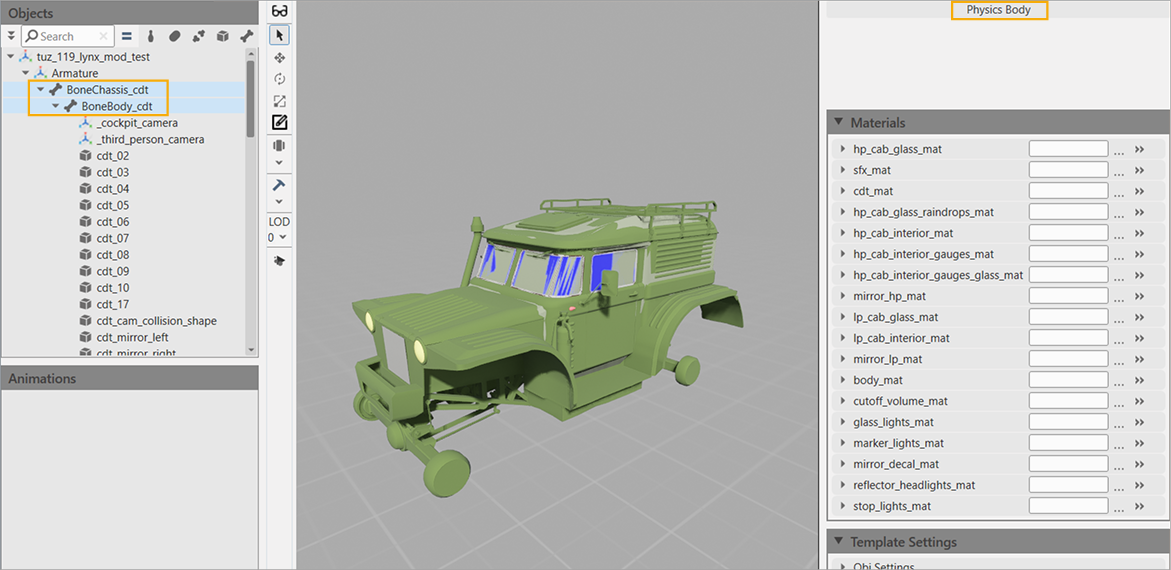
-
Mark all collision bones (with
cdt_*in their names) as physics shapes: select them in the Objects panel on the left and click Physics Shape in the Object Markup panel on the right.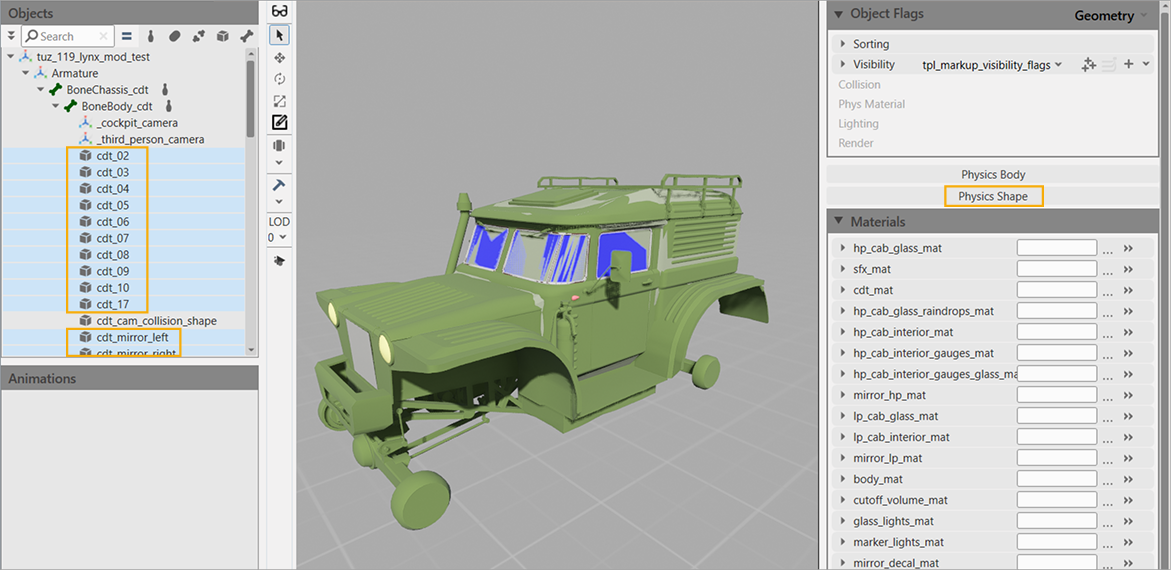
-
Optional: Save changes so that the icons indicating physics bodies and physics shapes are displayed next to objects in the Objects panel. If you do not save changes at this stage and continue setting up your TPL asset, these icons are not displayed.
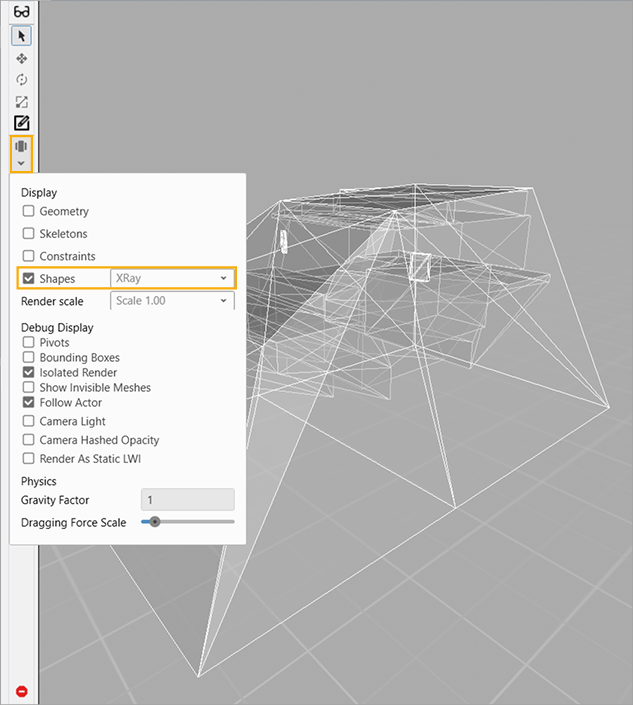
To make sure that all shapes are marked:
- In the Display Settings menu disable the Geometry option to hide the geometry.
-
Enable the Shapes option and select the display mode (Xray, Wireframe, or Solid).
Physics body setup
Let's take a look at the main Physics Body properties of the bones.
In tuz_119lynx_mod.tpl.asset, the setup is already in place — you can always study it as a sample. However, for your custom vehicle you must adjust a few parameters described below.
For the BoneChassis_cdt bone in tuz_119lynx_mod.tpl.asset, the following values are valid:
- Angular Damping — 1.5.
- Linear Damping — 0.01.
- Mass From Density — disable the option, so that you can set the mass of a physics body manually.
- Mass — 900.
- Restitution — 0.01.
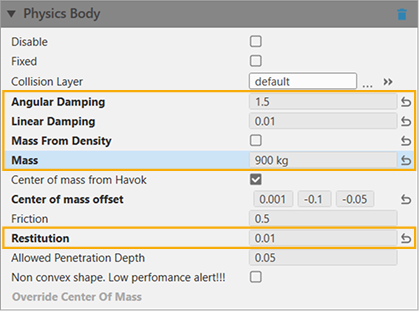
Distribute the Mass across the axes according to the vehicle's bone hierarchy. For a vehicle with front and rear axles, split the total mass evenly: if the initial mass is 1000 kg, then assign 500 kg to the front axle and 500 kg to the rear axle.
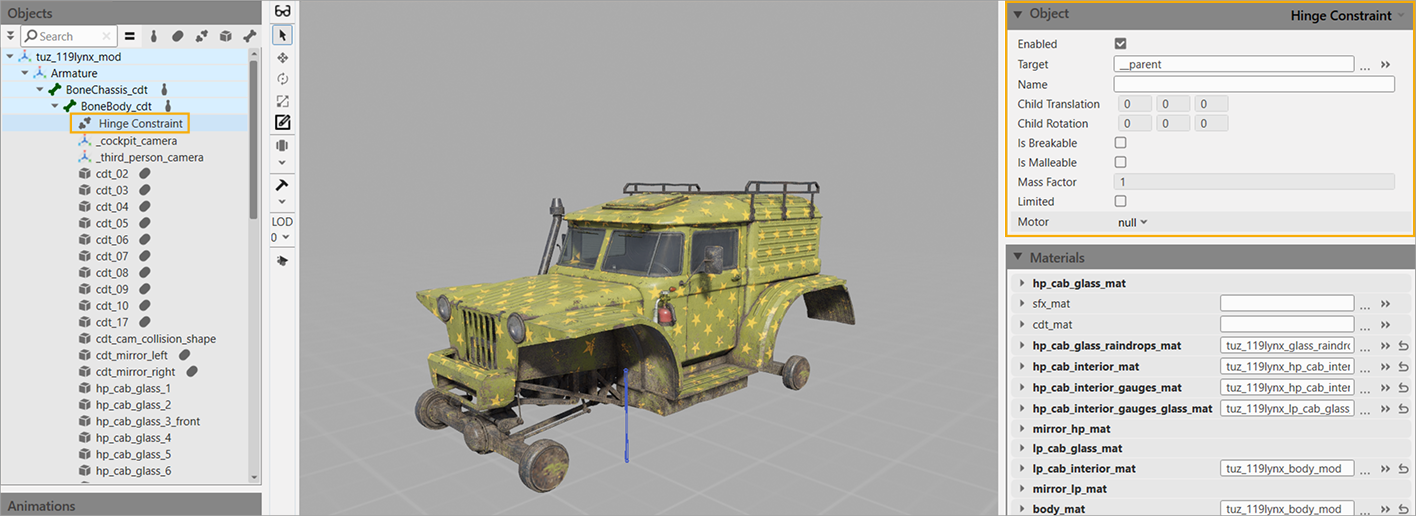
Constraints
Constraint connects two physics bones and sets how one bone can move relative to the other — either in a straight line or by rotating. You can create a constraint between a bone and its parent, or between any two physics bones.
Types of constraints:
| Type | Description |
|---|---|
| Ball and Socket | Allows angular movement around a fixed point on all three axes with no limits. |
| Fixed Constraint | Locks the bone in a specific point, or allows linear movement within a box of defined dimensions. |
| Hinge Constraint | Acts like a door hinge. Allows angular movement on a single axis. |
| Prismatic Constraint | Allows linear movement on a single axis. |
| Ragdoll Constraint | Allows angular movement around a fixed point on all three axes with angle limits. |
| Wheel Constraint | Simulates a wheel. |
Setting up constraints
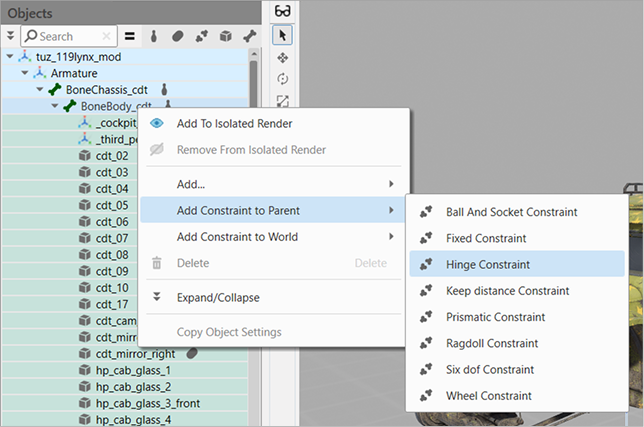
To add a constraint:
- Right-click the child bone in the hierarchy.
-
Select Add Constraint to Parent > Constraint.
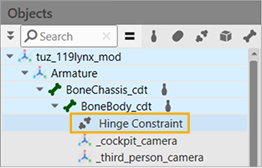
Once the constraint is added, it is displayed in the hierarchy:
-
Set the constraint settings in the Object panel on the right side.
Info
For more details on the constraint parameters, open tuz_119lynx_mod.tpl.asset and study the pre-defined ragdoll constraint.
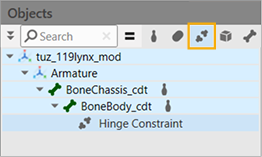
To filter out elements in the Objects panel, click on the buttons next to the Search field. For example, click Physics Constraint to hide other elements:
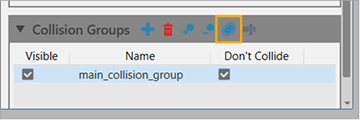
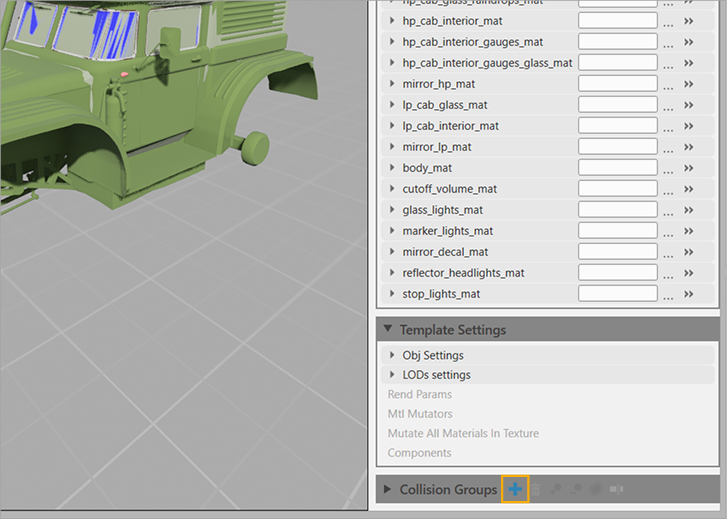
Creating collision groups
Collision groups prevent unnecessary collisions between physical bones, as bones within the same collision group do not collide with each other.
To create a collision group:
-
In the Collision Groups section click + to create a new group.
-
Optional: Rename the group by clicking Rename (or pressing F2).
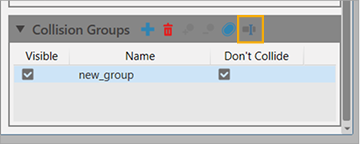
-
Select physics bodies (press Shift to select multiple objects — for
tuz_119lynx_mod.tpl.assetit isBoneChassis_cdtandBoneBody_cdt), in the Collision Groups section select the required group, and clcik Add Selected Objects to Selected Collision Groups.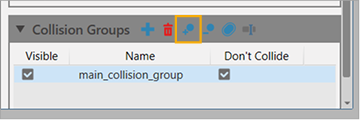
To check the elements in the group, click the Select Collision Groups Objects — the corresponding objects are highlighted in the Objects panel.