Game Logic
Configure gameplay logic using .bro-files. This is a special file format for describing game entities. Each .bro-file determines the generation of object classes that are used by the engine.
To get your vehicle working in‑game, create two .bro files:
vehicle_name.bro— defines the core functionality of the vehicle.wheel_vehicle_name.bro— defines the functionality of the vehicle’s wheels.
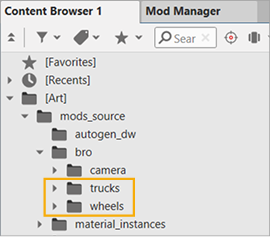
The files must be stored in the in the trucks and wheels folders in Art > mods_source > bro:
Wheels
Let's start with the .bro-file for the wheel, as this file is required for the vehicle setup.
-
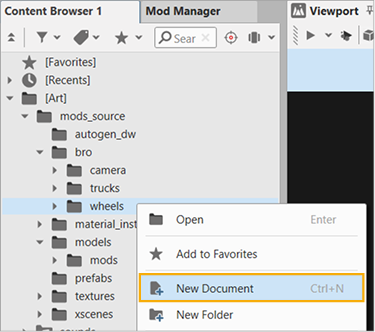
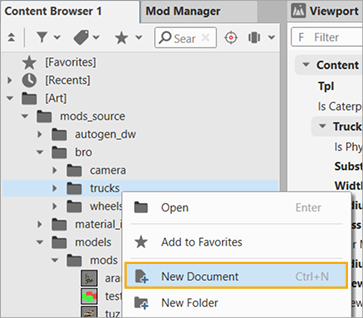
Right-click the Art > mods_source > bro > wheels folder and select New Document from the context menu.
-
In the Create File window, select the
Wheel (.bro)template, enter the name, and click Create.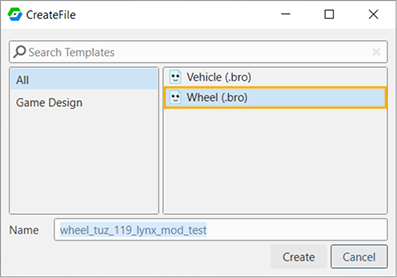
-
In the opened
.bro-file, set the wheel parameters: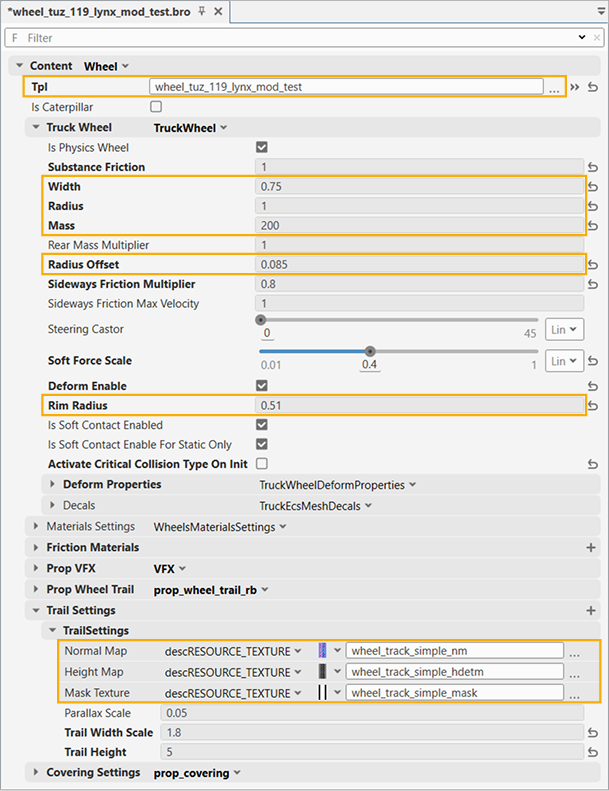
- Tpl — select your wheel model (click the three dots button).
- Truck Wheel > Width — the wheel's width, in meters. You can measure it in your modeling software.
- Truck Wheel > Radius — the wheel's radius, in meters.
- Truck Wheel > Mass — the wheel's mass, in kg. Note that low values might behave unpredictably.
- Truck Wheel > Radius Offset — the physical radius of the wheel cylinder. Affects the wheel deformation: the larger the offset, the deeper the wheel sinks into the ground and the more the wheel deforms.
- Truck Wheel > Rim Radius — the rim's radius. The rim does not deform like the tire during movement.
- Trail Settings — custom textures for trails: normal map, height map, and mask texture.
-
Save the file.
Info
Study a proper setup in wheel_tuz_119lynx_mod.bro.
Vehicle
To set up the .bro-file for the vehicle:
-
Right-click the Art > mods_source > bro > trucks folder and select New Document from the context menu.
-
In the Create File window, select the
Vehicle (.bro)template, enter the name, and click Create.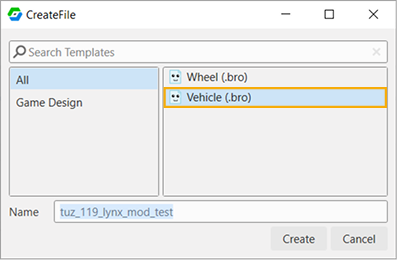
-
In the opened
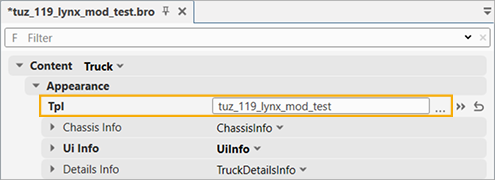
.bro-file:-
Content > Appearance > Tpl — select your truck model (click the three dots button).
-
Content > Generic > Wheels > Wheel — select the wheel that you have prepared previously. For example, if your wheel file is
wheel_tuz_119_lynx_mod_test.bro, enter its name into the search field without spaces. Note that even not precise name is acceptable in this field: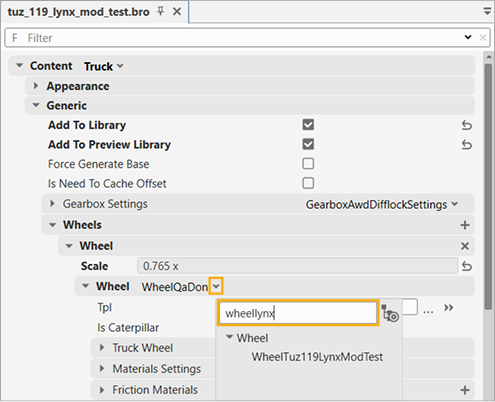
-
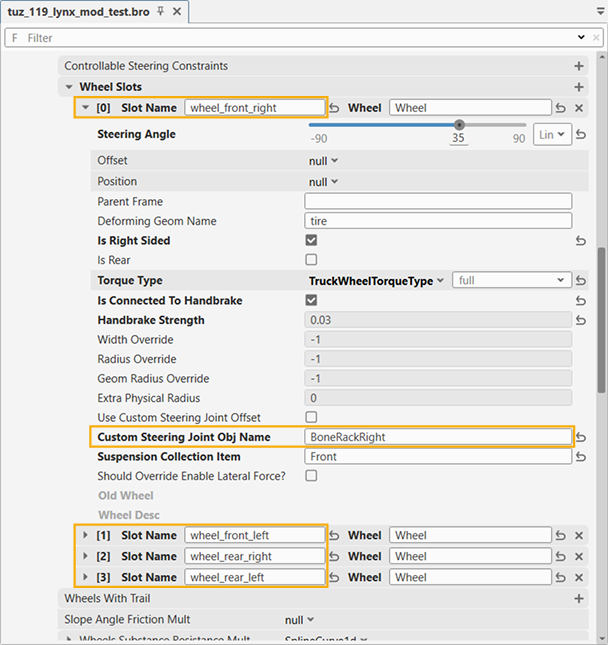
Truck Settings > Wheel Slots — specify the names of the bones to which the wheels are attached.
-
Enter the info:
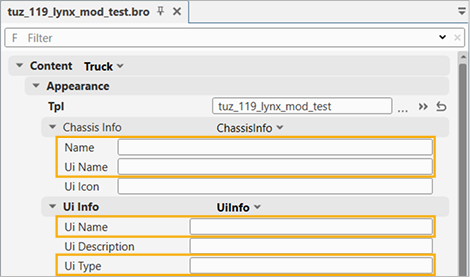
- Appearance > Chassis Info > Name — internal name of the vehicle (not displayed in the game). In the sample below:
TUZ_119LYNX_SCOUT_MOD - Appearance > Chassis Info > Ui name — the name ofthe vehicle that is displayed in the garage. In the sample below:
TUZ_119LYNX_MOD -
Appearance > Ui Info > Ui name — the type of the vehicle that is displayed in the garage. In the sample below:
Scout_mod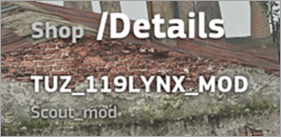
-
Appearance > Ui Info > Ui Type — set the truck category. Truck types that can be used as UiType correspond to the vehicle category names in the garage, maintaining the same order:
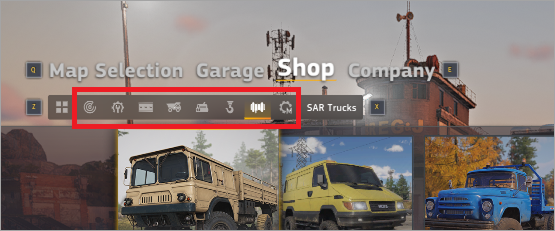
UID_TRUCKS_TYPE_SCOUTUID_TRUCKS_TYPE_SPECIALUID_TRUCKS_TYPE_ROADWORKSUID_TRUCKS_TYPE_CARGOUID_TRUCKS_TYPE_LOGGINGUID_TRUCKS_TYPE_CRANEUID_TRUCKS_TYPE_SAR_TRUCK
- Appearance > Chassis Info > Name — internal name of the vehicle (not displayed in the game). In the sample below:
-
-
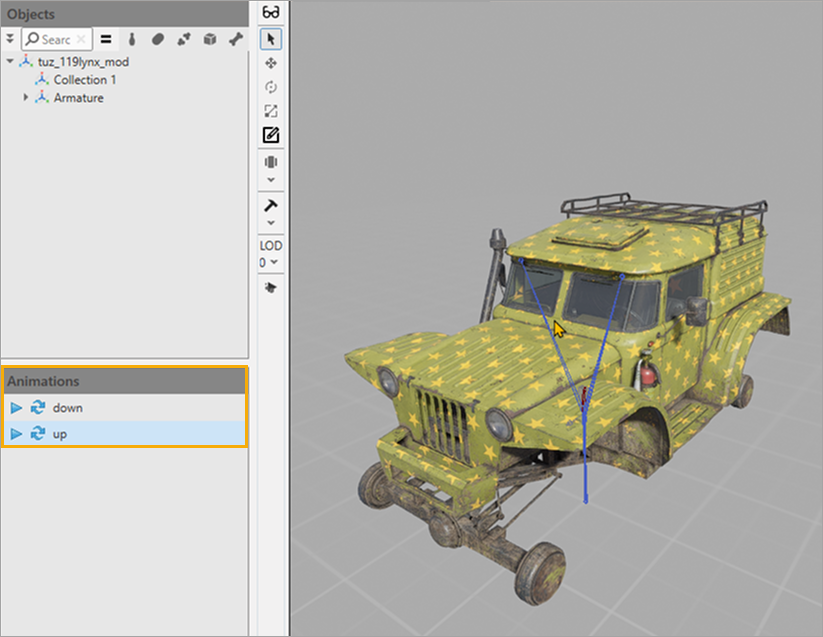
If the animation setup and integration were successful, the animations appear in the TPL viewer:
To set up the animation (in this sample the animation of wipers), modify the
.bro-file of the vehicle: Content > Modules, the Tpl Animation and Truck Rain Settings sections.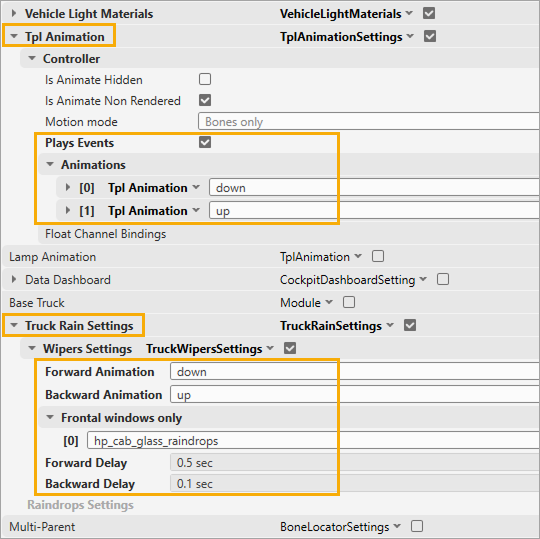
Tpl Animation:
- Enablt the Plays Events option.
- Specify animation sequences in the Animations section.
Truck Rain Settings:
- Specify animation sequences in the Animations section.
- Specify the mesh for displaying wiper tracks.
- Optional: set the wipers' delay in the Forward Delay and Backward Delay fields.
-
Save the file.
The wipers are automatically activated in game during heavy rain. You can manually activate the wipers using the debug hotkey: Right Ctrl + /.
To change the weather, use the Weather Manager tool. To do so, press F5 and select RENDER > WEATHER MANAGER.

The Weather Manager:
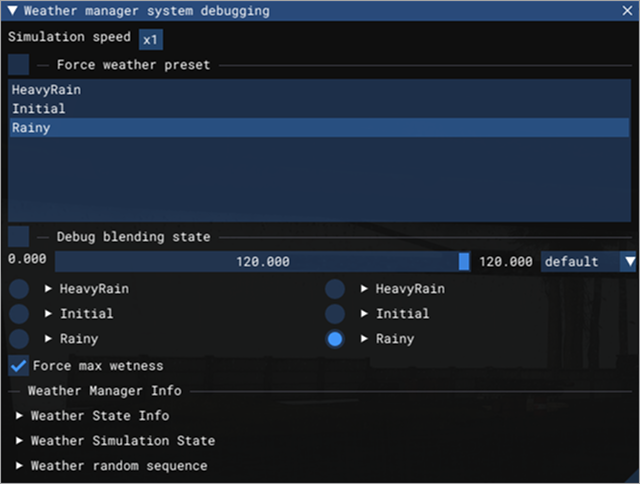
- Weather preset: enable the option and select a preset from the list.
- Debug blending state: switch between weather presets.
Note
All mod tracks will be available in the final category — Modded Trucks. Later (stay tuned for upcoming patches) they will also appear in the main categories. A mod truck must belong to its assigned category (e.g., Scout) and be available in the Mod Truck category as well.
This setup is sufficient for a simple truck mod. For more advanced functionality, refer to the example .bro-files included in the mod editor:
tuz_119lynx_mod.bro— a simpler version of the.bro-file setup. It covers the essential functionality.aramatsu_crayfish_wood_grapple_mod.bro— a complete, fully configured vehicle mod from the game.
Info
For extended functionality, study the Blueprints guide — it covers interactive diagrams for visual scripting using functional nodes.