Adding Mod Trucks to Scene
There are 3 ways to add your mod truck into the game.
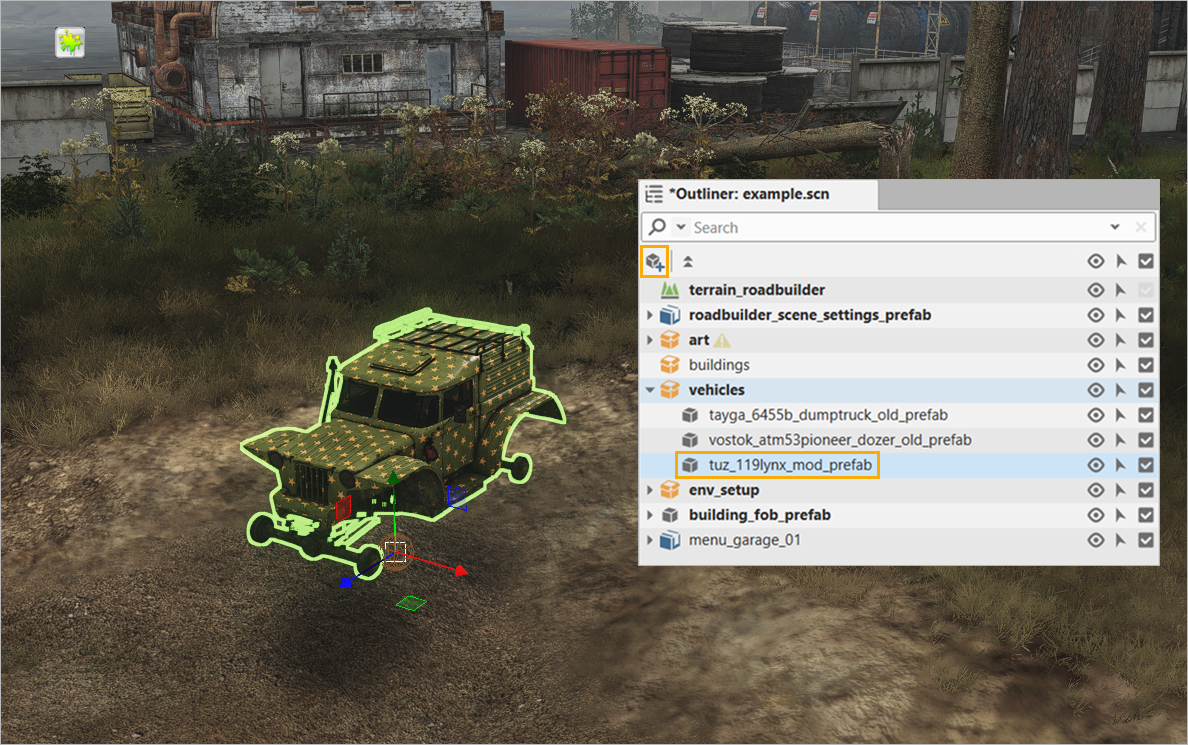
Adding prefab
This option is intended for debugging purposes. For most use cases, other options are more suitable. To spawn a vehicle on the map without using a garage, use the blueprint spawn method (see below). Attempting to package a custom map and a custom truck into a single mod using a map-placed prefab will cause a crash during the mod packaging.
In the Edit Mode, add the prefab of your mod truck to the scene. The truck will be available in the game, so you can select it.
Debug window: Create Truck
In the Game Mode:
-
Press F2 to open the Debug UI:
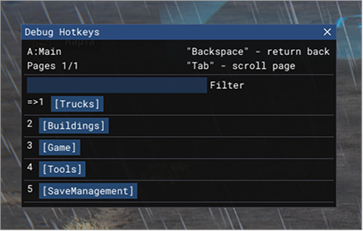
-
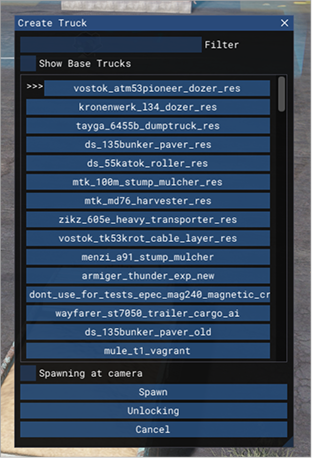
Go to Trucks > Windows > ShowTruckCreateWindow. To quickly open the Create Truck window, you can use either the key combination 1-1-2, or the hotkey Left Ctrl+Left Alt+0.
-
In the Create Truck window, select the truck and click somewhere on the map or enable the Spawning at camera option and click the Spawn button.
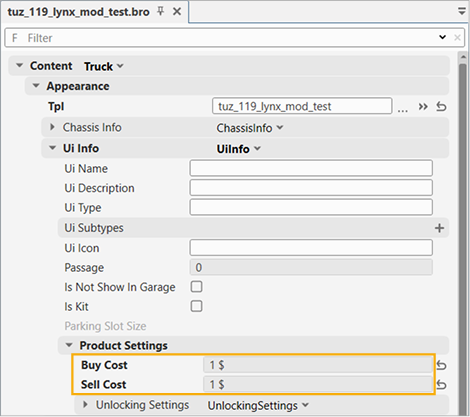
Purchasing in garage
You can buy the mod truck in the garage. By default all mods cost 1$, but you can modify this value in the mod's .bro-file in Appearance > Ui Info > Product Settings:
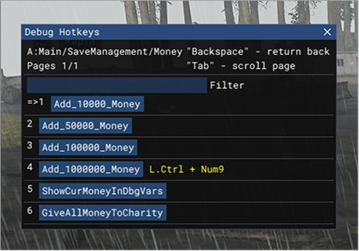
To add money in the Game Mode:
- Press F2 to open the Debug UI.
-
Go to Save Managment > Money and select the required amount. You can use the key combination 5-1-:
Using Blueprints
To set up a truck mod on a custom map for multiplayer — if you created a stationary crane or another vehicle that cannot be spawned from a garage, or if a garage is unsuitable for any other reason — use blueprints and objectives.
This guide covers objectives, tasks, and domains — address the corresponding chapters to learn more about them.
For this particular use case, let's create an objective containing a task of the ReachLocation type. This task will be triggered once at game start because its completion zone (domain) overlaps the truck's start zone. As it is described in the article on domains, the ReachLocation type requires the objective_domain prefab.
Creating new objective
-
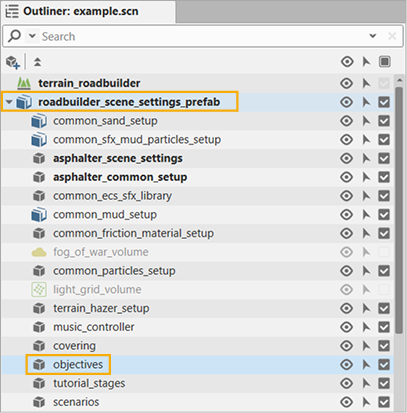
In Outliner select scene_settings > scene_settings_prefab > objectives.
-
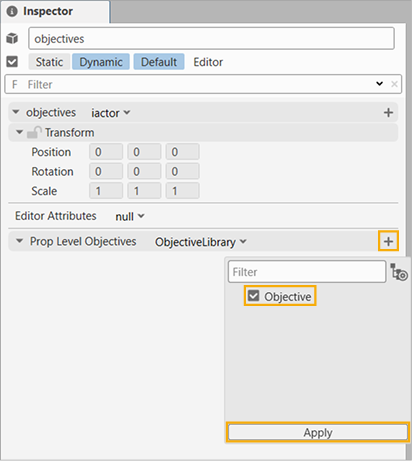
In Inspector, in the Prop Level Objectives section click the + button and add a new entry.
Creating domain
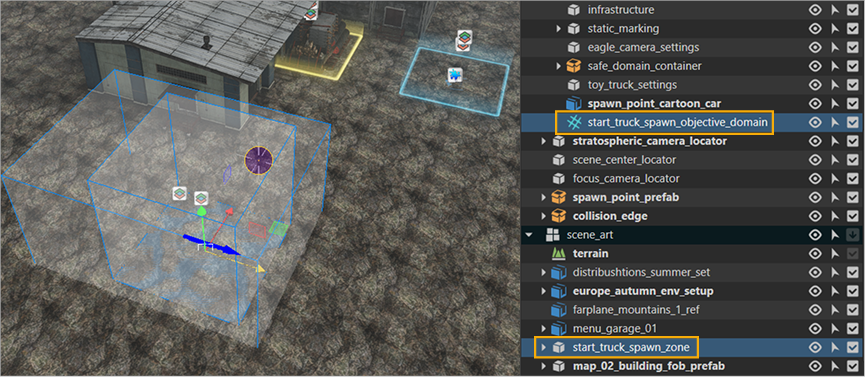
Create a domain that overlapps with the start truck's spawn zone.
-
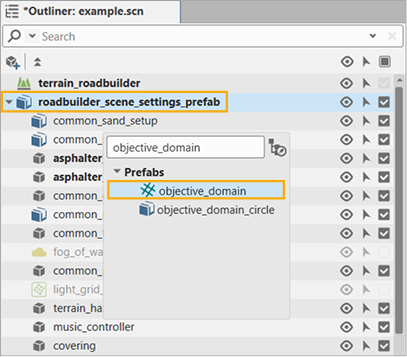
In Outliner, inside scene_settings_prefab, create the objective_domain object.
Change its position and scale it in editor, so it overlaps with the start_truck_spawn_zone. Alternatively you can place it anywhere you wish that while you’re entering you want to spawn your trucks. Start zone is convenient as domain intersection will be triggered immediately on level start and relevant mod trucks will be created
In the screenshot below: objective_domain and start_truck_spawn_zone.
Note that the following cases are acceptable:
- The domain and spawn zone are almost completely overlapping.
- The domain is larger than the spawn zone.
Creating placer for mod truck
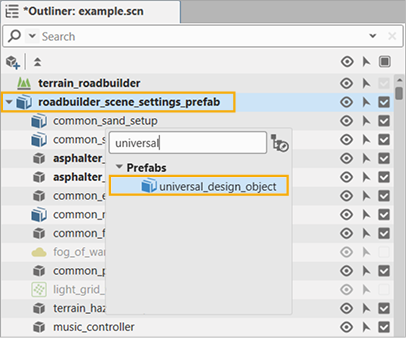
Create a universal design object that will be used as a placer for mod truck.
-
In Outliner, inside scene_settings_prefab, create the universal_design_object object.
-
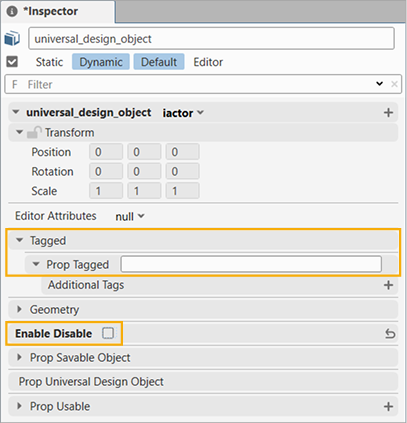
Place universal_design_object in the world at the desired spawn location for your mod truck, approximately 1 meter above the ground level.
-
In Inspector enter the label in Tagged > Prop Tagged and disable the Enable Disable checkbox.
Creating new ReachLocation task
- In Outliner, select scene_settings_prefab > objectives.
-
For previously created objective, create new reward in Prop Level Objectives in Inspector:

-
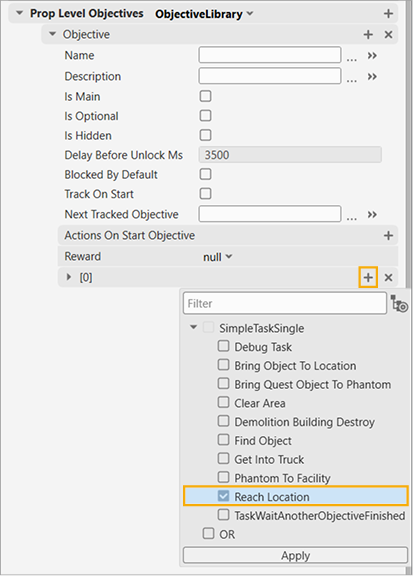
Create a new objective step: click + in the Objective section — a new step field is added.

-
Create a new objective task: click + in the step string and select Reach Location.
-
For ReachLocation task add a new entry in the Target Domains field: select the previously created domain (in this sample's case it is
start_truck_spawn_objective_domain, see above).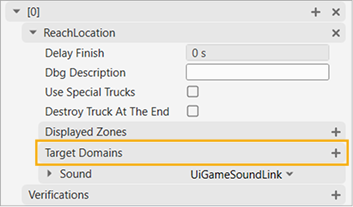
-
In the Action On Finish Step section, add a new entry and select Unlock Object Logic:
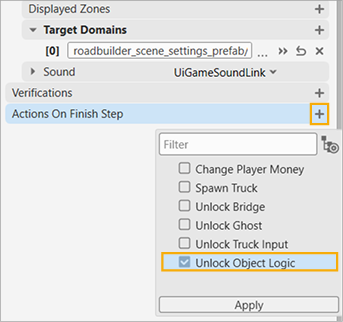
For this UnlockObjectLogic select the universal design object for the truck spawn point you have created earlier (see above).
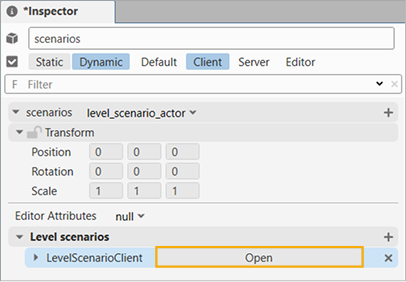
Creating Blueprint
Add the blueprint setup for one-time reaction once the objective is complete.
-
In Outliner, select scene_settings_prefab > scenarios. Add a new entry to Level scenarios if no entry present. Click Open to view the blueprint.
-
In the blueprint, right-click an empty space, add the Create Truck node and specify your truck mod in the Name field.
- Add the Get First Tagged Actor node and enter the Tagged > PropTagged field you set up earlier for the truck spawner universal design object (see above).
- Add the OnEnabled and GetActorTransform3d nodes. Connect the output of the GetFirstTaggedActor node to the Actor input of both nodes.
- Connect the OnEnabled output to the CreateTruck input.
- Connect the GetActorTransform3d output to the transform input of CreateTruck.
The sample setup:

Now you can test this setup — it should be ready for multiplayer!