Material Setup
To assign materials to your model, create materials instance assets based on provided Material presets — these assets will be your main materials. You can add textures to these materials and use them for your vehicle.
To create material instance:
-
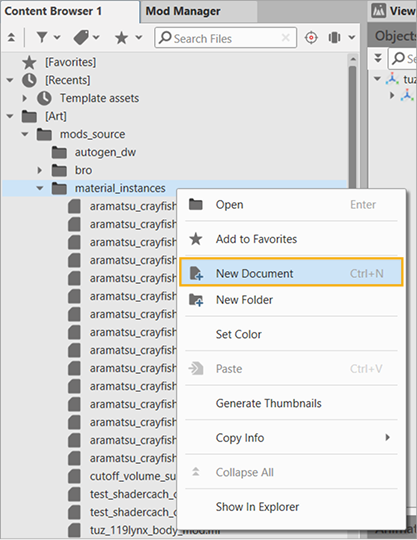
In Content Browser, right-click Art > mods_source > material_instances and select New Document.
-
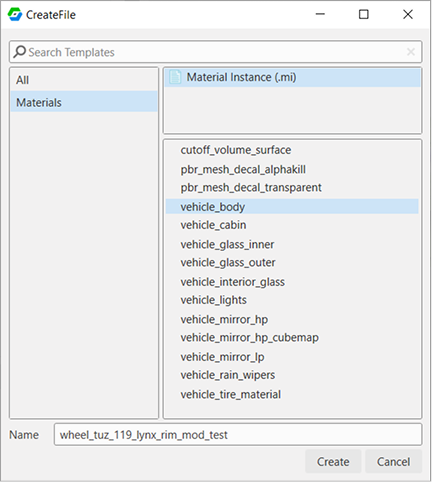
Select the preset (see the list below).
- Enter the name of your material instance.
-
Click Create. The new tab with the material settings opens.
-
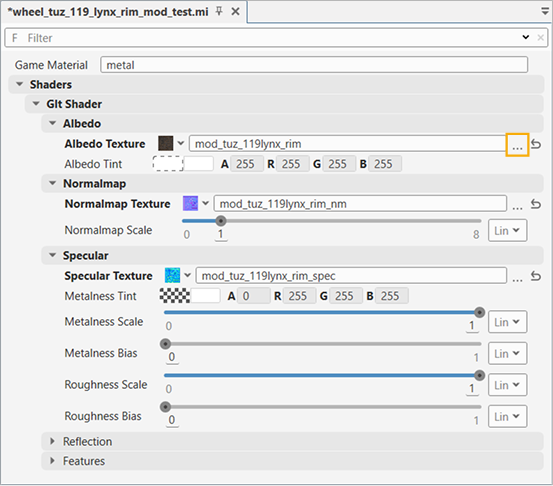
In the opened tab, set the textures for your material instance. To select a texture, click the button with three dots next to the N Texture field:
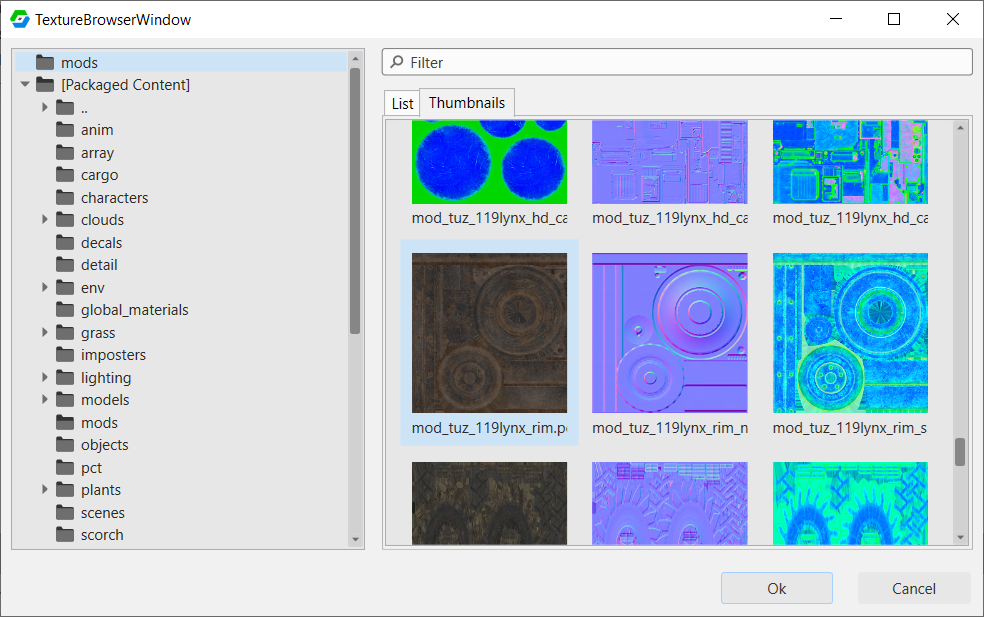
Select the texture (you can use the Filter field to search for textures):
Feel free to experiment and override the values of the parameters (such as Albedo Tint, Normalmap Scale, etc.).
Info
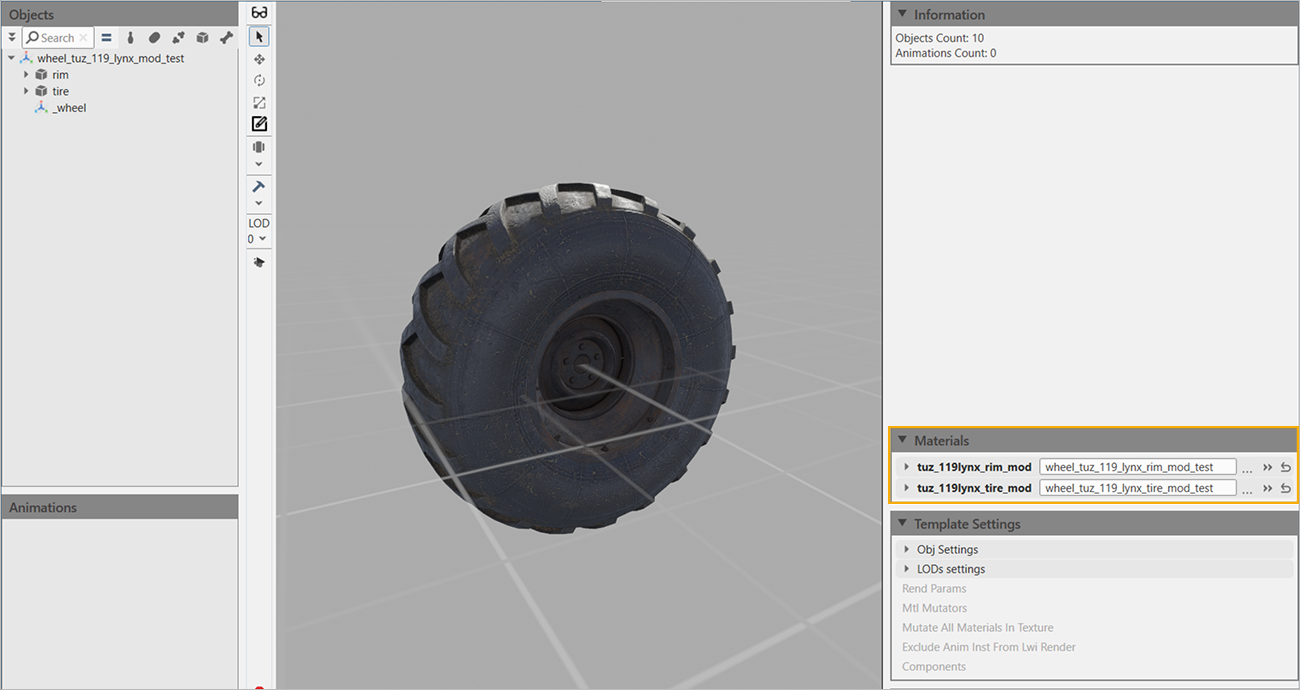
You can study the setup in \mods_source\material_instances: for example, wheel_tuz_119lynx_rim_mod.mi and wheel_tuz_119lynx_tire_mod.mi.
Material presets
| Preset | Description |
|---|---|
| cutoff_volume_surface | The body that cuts off water and grass inside the cabin. |
| pbr_mesh_decal_alphakill | Decals. |
| pbr_mesh_decal_transparent | Decals. |
| vehicle_body | Main vehicle body. |
| vehicle_cabin | The interior of the cabin. |
| vehicle_glass_inner | Interior windows. |
| vehicle_glass_outer | Exterior windows. |
| vehicle_interior_glass | Dashboard glass. |
| vehicle_lights | Headlights. |
| vehicle_mirror_hp | Mirrors with complex reflections from the first-person view. |
| vehicle_mirror_hp_cubemap | Mirrors with simple reflections from the third-person view |
| vehicle_mirror_lp | Mirrors from the third-person view. |
| vehicle_rain_wipers | Windshield wipers. |
| vehicle_tire_material | Tires. |
For sfx_mat and cdt_mat you do not need to create material instances and assign materials.
Example
For a wheel setup you can use the following presets for material instances:
vehicle_body— for the wheel hub.vehicle_tire_material— for the tire.
Once the materials are set up, set them in the Materials panel:
Dynamic material setup
Dynamic materials allow the game logic to switch material instances. For example, stop lights materials: without emission and with emission — emission activates when braking.
Let's take a look at the setup of dynamic materials on tuz_119lynx_mod.tpl.asset.
Controls
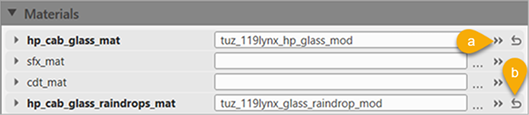
- a — open the material instance for editing.
- b — remove the material from the slot.
Dynamic material: TPL
-
In the Materials panel, click the three dots button next to the material field and set the material instance. This is the basic material instace — in this sample it is
tuz_119lynx_hp_cab_interior_gauges_mod.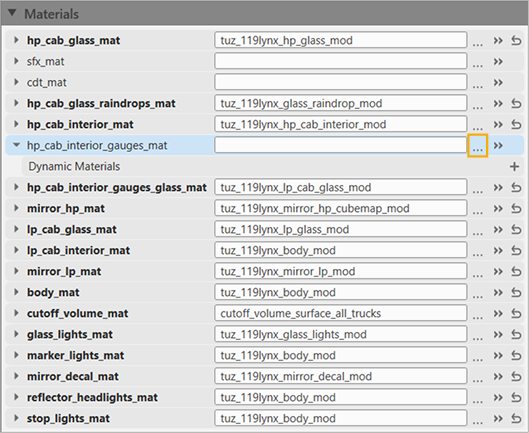
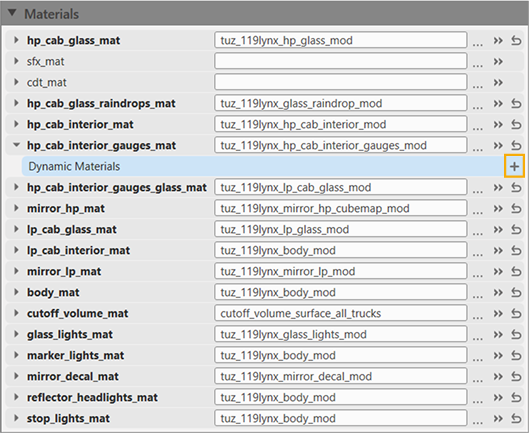
-
In the material's Dynamic Materials subsection, click + twice to add materials for two states of the gauges: without backlight and with backlight.
-
Rename the materials. The names must match the names that are used in the
.brofile (see below). In this case the names aredefaultandlights_emissive.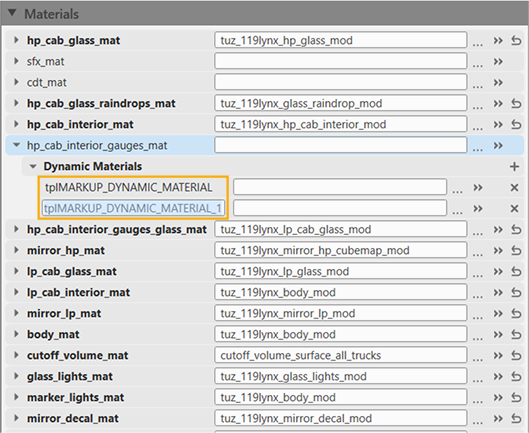
-
In the dynamic materials slots, set the material instances. Note that the
defaultmaterial must match the basic material instace (see above). The alternative material is the one the gauges are going to switch to — in this case it is the state with backlight (emissive variant).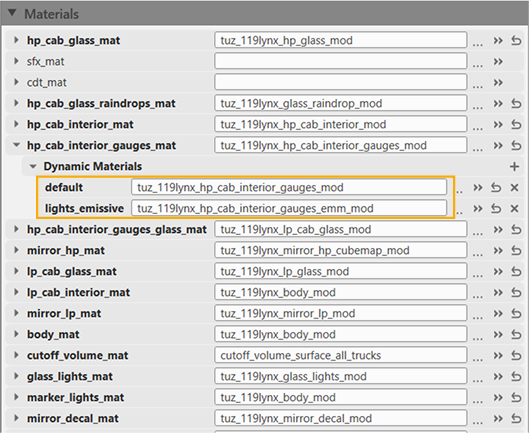
Dynamic material: .bro-file
In the truck's .bro file open the corresponding section. In this case it is Modules > Vehicle Light Materials > Lights > cockpit:
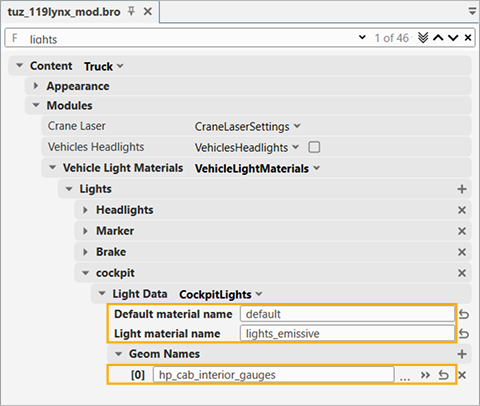
- Default material name and Light material name must match the names from the Dynamic Materials section (see above).
- Geom Names — geometry the material is applied to.