Importing 3D model
Note
To ensure your model imports correctly into Mod Editor, make sure you have Blender version 4.5 or 5.0 installed on your PC.
Before importing
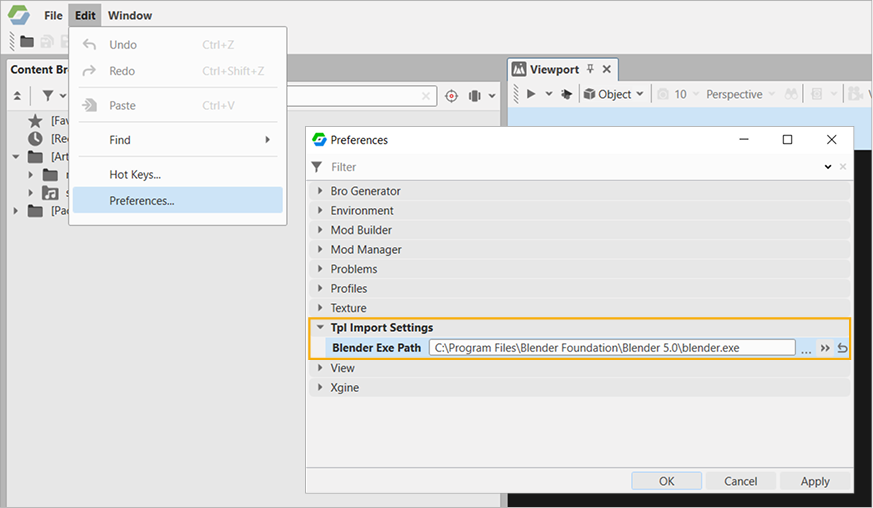
Before importing your model into Mod Editor for the first time, set the path to Blender in the Mod Editor settings:
- Go to Edit > Preferences
- Expand the Tpl Import Settings section and specify the path in the Blender Exe Path field.
- Click OK.
For example, the path can be the following: C:\Program Files\Blender Foundation\Blender 5.0\blender.exe.
Importing model
To import the truck asset to Mod Editor:
- In Mod Editor, in Content Browser, navigate to the
Art > mods_source > models > modsfolder. -
Right-click the
modsfolder and select Import Asset from the context menu.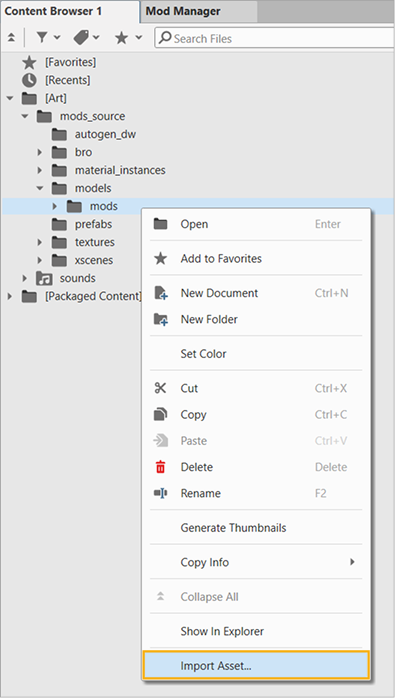
-
Specify the truck's 3D asset file. Mod Editor supports only two file formats for integration:
.blendand.fbx. For the initial import, the asset file can be located anywhere on your disk. During the import process, it is duplicated and placed in the source folder:%userprofile%\Documents\Saber\IntegrationStudio\mods_source\mods\vehicle_name.tpl.asset\. If you want to make changes to the finished asset, you can modify and re-import the source file. -
In the Create File window, specify:
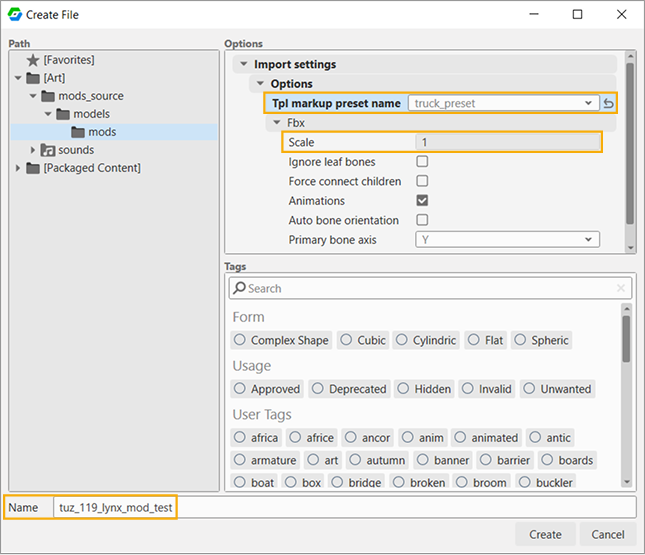
- Import settings > Options > Tpl markup preset name — select truck_preset for vehicles, wheel_preset for wheels.
- Import settings > Options > Fbx > Scale — if you are importing an
.fbxfile, set Scale according to the units used in your 3D editing software. - Name — use only lowercase letters, numbers, and underscores. Uppercase letters and special characters (except
_) are not allowed.
-
Click Create. Vehicle import may take some time. View the details of the import process in the Output window (see below).
During the import process, your source file (.fbx or .blend) is copied to
%userprofile%\Documents\Saber\IntegrationStudio\mods_source\mods\vehicle_name.tpl.asset\. This folder stores all the source files for your vehicle. If you want to modify the model, edit and reimport the file located in this folder.
Once the import is finished, a new file for your 3D model is created:
- The file is available in the
modsfolder. - The file has the name you specified in the Name field of the Create File window earlier.
- The file has the extension
.tpl.asset
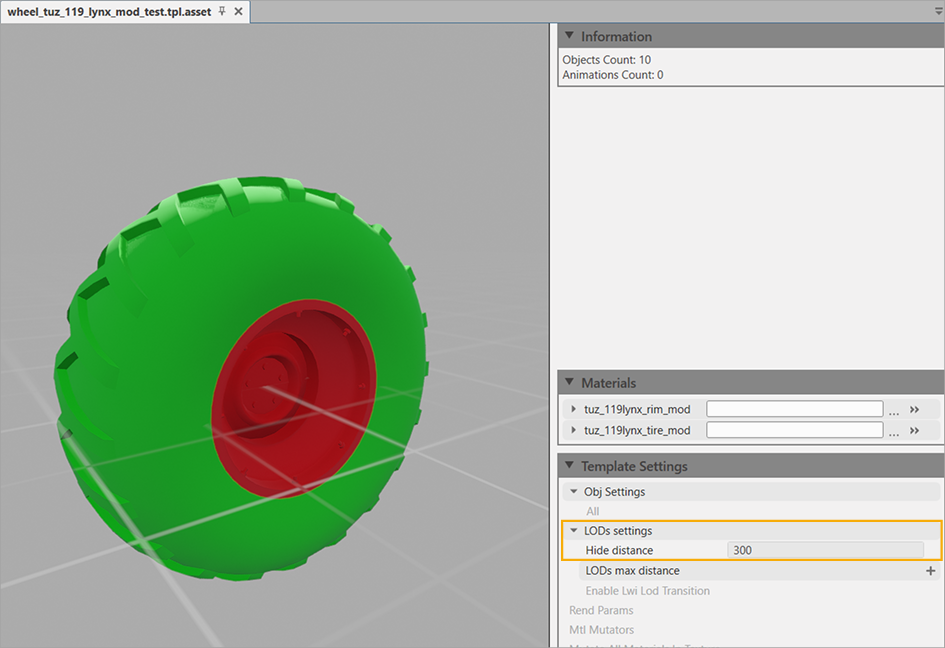
To view the model in Mod Editor, double-click the .asset file in the mods folder:
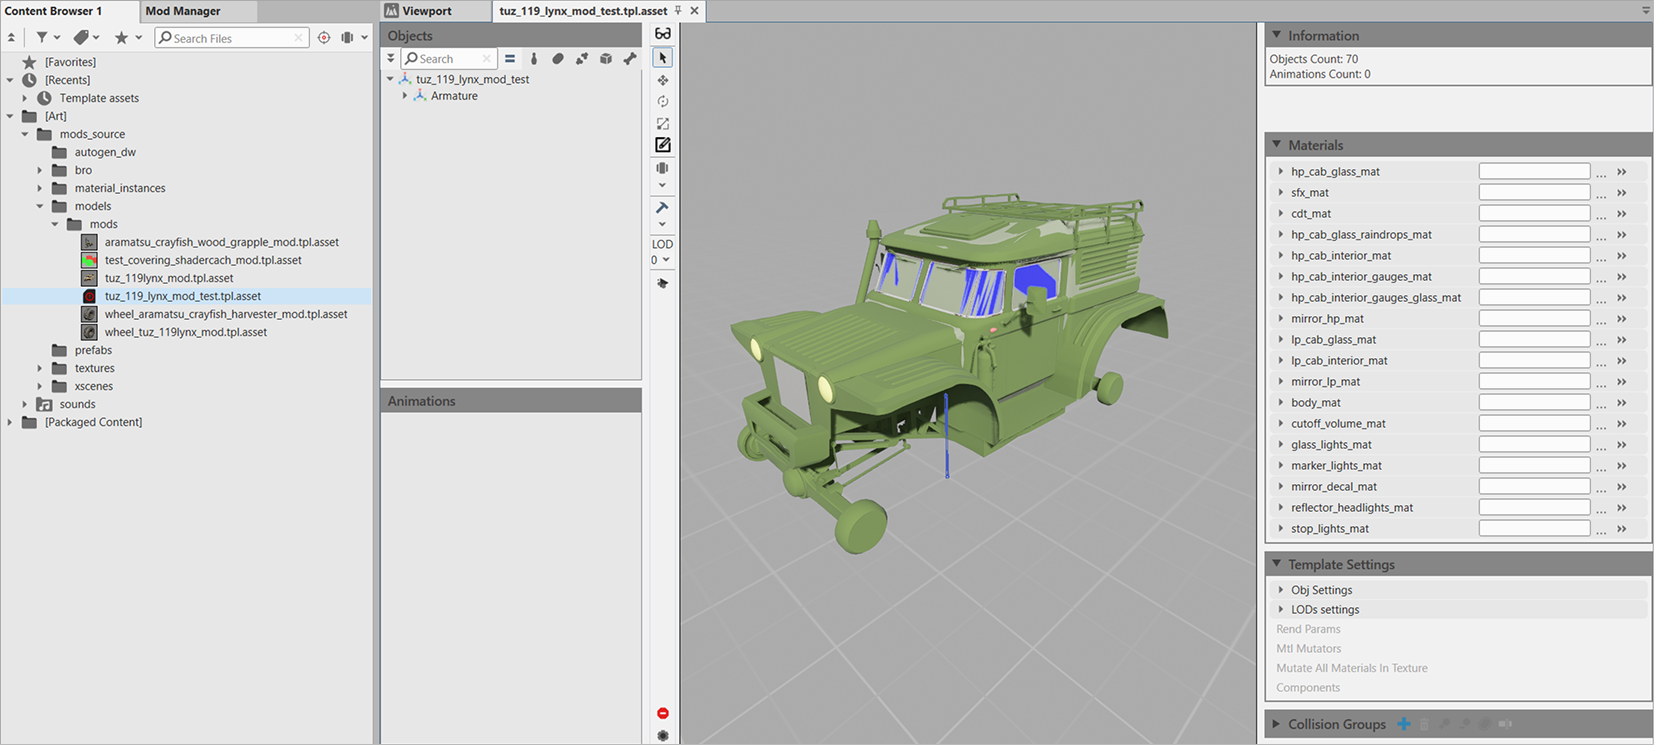
Sometimes after the wheel export the viewer might be empty. In this case change the Template Settings > LODs Settings > Hide distance — set the value of 300, for example.
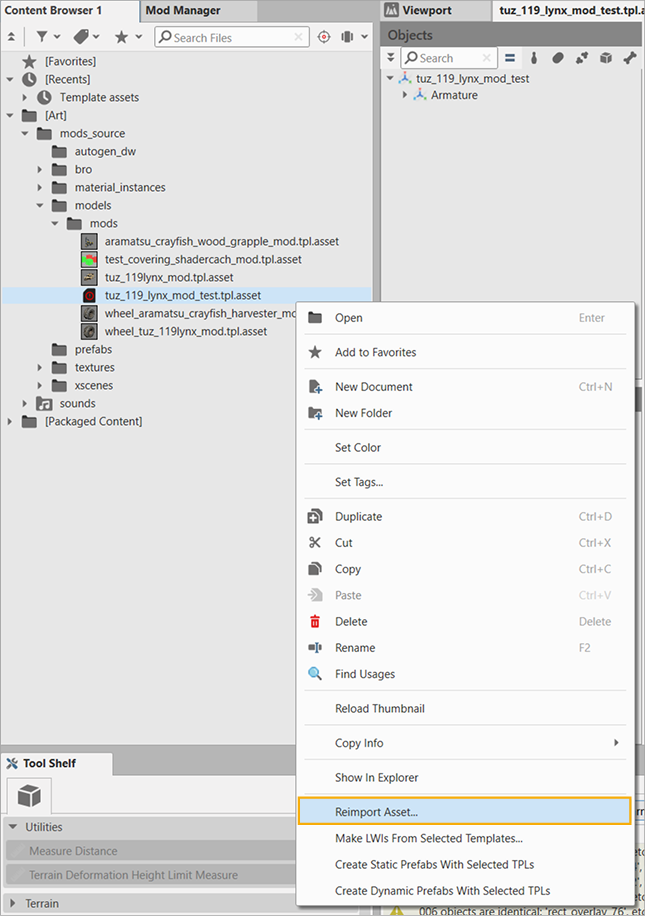
Reimporting model
If you want to modify your vehicle's 3D model, you do not need to import it from scratch. To reimport the 3D model:
- Edit the source file located at
%userprofile%\Documents\Saber\IntegrationStudio\mods_source\mods\vehicle_name.tpl.asset\ - In Mod Editor, in Content Browser, navigate to your already imported vehicle at Art > mods_source > models > mods.
- Right-click the vehicle and select Reimport Asset from the context menu.
Output logs
If you encounter issues while importing a TPL asset (the asset is not created at all or it is created incorrectly), check the logs. To view them, select Windows > Output in the top toolbar. Filter by the TPL category (if it is not in the list, open any *.tpl.asset-file to launch TPL Viewer) and look for strings with the ERROR type. This will help you determine whether the import succeeded, and if not, what went wrong.
