Adding Textures
Adding texture files
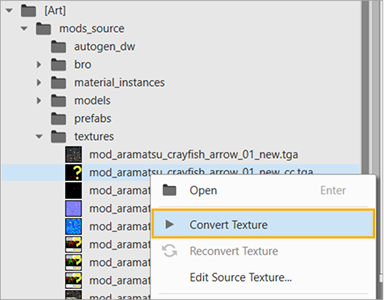
Prepare the textures for your truck and copy them to %userprofile%\Documents\Saber\IntegrationStudio\mods_source\textures. In Content Browser they are available in Art > mods_source > textures:

Note that icons have the ? symbol — that means the textures are not converted yet. That is the next step in the setup.
Converting textures
-
Right-click a texture and select Convert Texture from the context menu.
-
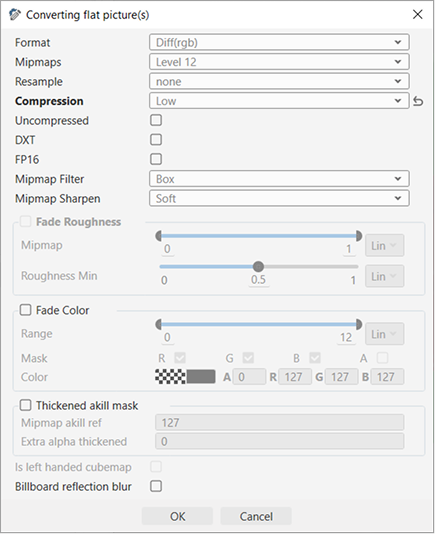
In the Converting flat picture(s) window, select the required format in the Format field. You can experiment with adjusting parameters (see the Parameters section below), but it is recommended to keep the default values.
-
Click OK.
Repeat the process for all the textures you have added. Once it is done, you will be able to use these textures when setting up the material instances.
Parameters
Note
It is recommended to keep the default values. Adjust the parameters at your own risk.
|
Parameter |
Description |
|---|---|
|
Format |
|
|
Mipmaps |
The number of mipmaps that will be generated for the texture. |
|
Resample |
Downscaling the texture in the game engine. |
|
Compression |
Compression quality defines the texture compression applied during conversion (similar to the JPEG compression), ranging from Very Low to Extreme. The faster the compression, the lower the quality of the resulting texture. Very Low — minimum compression time > minimum texture quality. Extreme — maximum compression time > maximum texture quality. |
|
Uncompressed |
It is recommended to always use the texture compression (thus, the option is disabled by default). Use uncompressed textures only in exceptional cases, e.g., for debugging. Uncompressed disabled — Texture compression is applied. Uncompressed enabled — Texture compression is not applied (this has a significant impact on performance). |
|
FP16 |
When converting an HDR image, enable this option to perform a conversion without HDR compression, using a 16-bit floating-point format (16 bits per channel). Note that texture compression is not supported in this mode. |
|
Mipmap Filter |
A set of mathematical filters for generating mipmaps. |
|
Mipmap Sharpen |
The sharpening filter for generated mipmaps:
|
|
Fade Roughness |
Gradual changes to roughness based on mipmap levels:
|
|
Fade Color |
Gradual color changes across mipmap levels:
|
|
Thickened akill mask |
Increases the alpha channel mask:
|
Info
For more details on formats, see the Texture Naming article.