Attaching Meshes to Bones
After creating the bones, you must attach collision and visual meshes to them. The attachment processes for these mesh types differ: read the sections below.
Parenting of collision meshes
Note
Apply Rotation and Scale for Body and Armature to make sure the model is exported properly. It is recommended to apply geometry transforms before attaching components to Armature. To do so, select the component, press Ctrl+A, and select Rotation and Scale.
Collision objects should be parented to physical bones as a whole, without skinning. Here is one way to do it:
-
Switch to Edit Mode or Pose Mode and select the target bone to which you want to attach the
cdt_...geometry. E.g., you can select theBoneBody_cdtbone.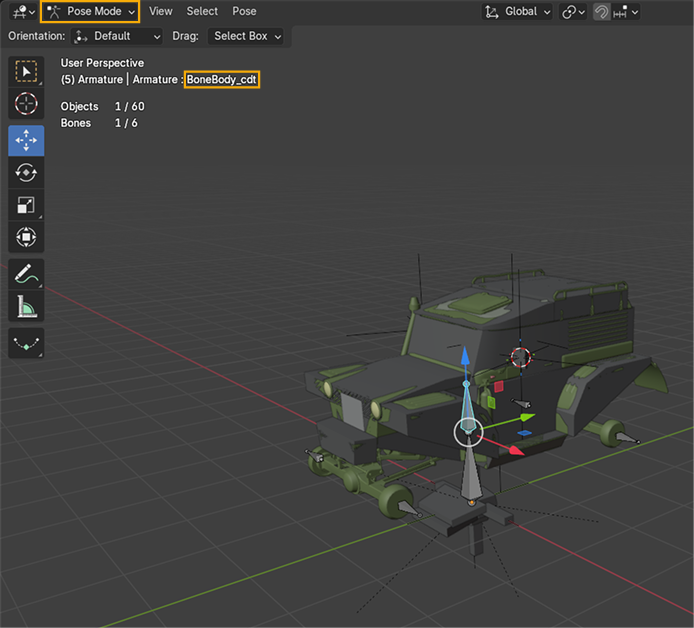
-
Switch to Object Mode, select the
cdt_...geometry you want to attach (e.g.body_geom).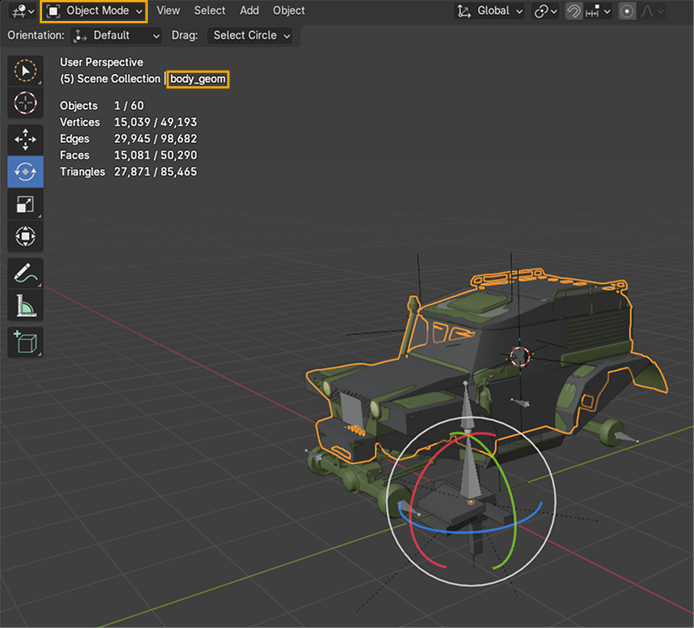
-
Hold Ctrl to keep the
cdt_...geometry selection and click Armature in Outliner.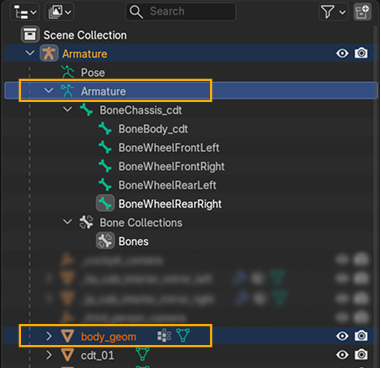
-
Press Ctrl+P and select Bone from the context menu (or select Parent > Bone from the Object menu).
Info
For more details on Parenting, see the official Blender documentation.
If done correctly:
-
In Pose Mode, the
cdt-mesh will move synchronously with the target bone: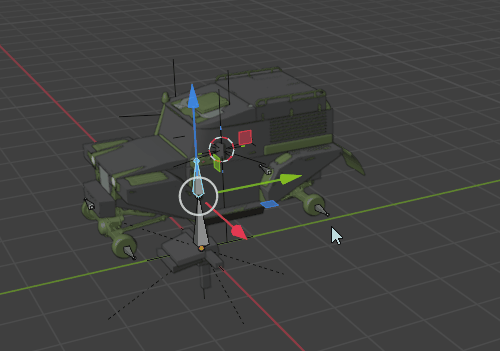
-
In Object Mode, select the geometry and check Object Properties > Relations. The setup should be the following:
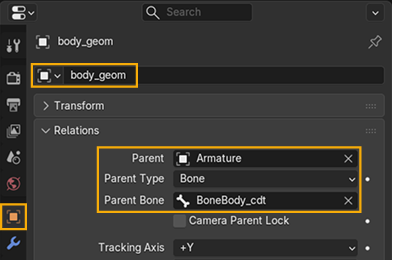
- Parent — Armature.
- Parent Type — Bone.
- Parent Bone — the name of the geometry.
Skinning of visual meshes
Let’s attach the visual meshes to the bones via skinning — parent them to the truck’s bones with weight assignments.
Some mesh parts (doors, panels) are skinned to a single bone with uniform weights. Other parts (springs) require more precise skinning, where weights are distributed across multiple bones for smooth deformation.
Info
For more details on vertex groups, see the official Blender documentation.
Note
If you are using software other than Blender, set the .fbx skinning type to Linear. Dual quaternion skinning is not supported.
Parenting visual meshes to Armature
Let's start with parenting visual meshes to Armature with empty vertex groups:
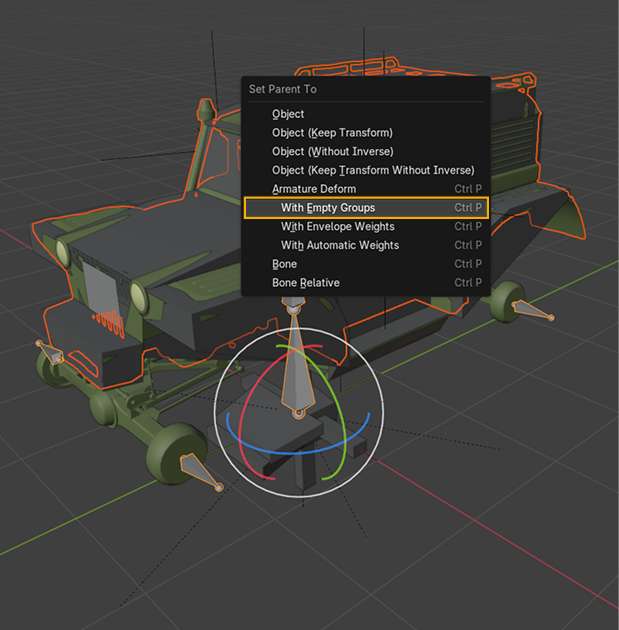
- Switch to Object Mode and select the target visual mesh. E.g., you can select
body_geom. - Hold Shift and click one of the Armature's bones in the viewport to select Armature. Now you have both geometry (
body_geom) and Armature selected. -
Press Ctrl+P and select Armature Deform > With Empty Groups (or select the similar option from the Object > Parent menu).
Repeat the process for all visual mesges. As the result, vertex groups for each bone are created, however, these groups are empty: no vertices assigned, no weights set. The next steps are to add vertices to these groups and add weights to these vertices.
Assigning weights
Assign weights to the body mesh and the chassis mesh of the truck. The process of assigning weights to the body mesh is desribed below. As the truck's body does not deform, assign 1.0 (100%) weight for the whole body mesh.
- Switch to Edit Mode and select all vertices of the mesh (in this sample it is
body_geom). -
In Data > Vertex Groups: set Weight to 1.000, select the vertex group (in this sample it is
BoneBody_cdt), and click Assign.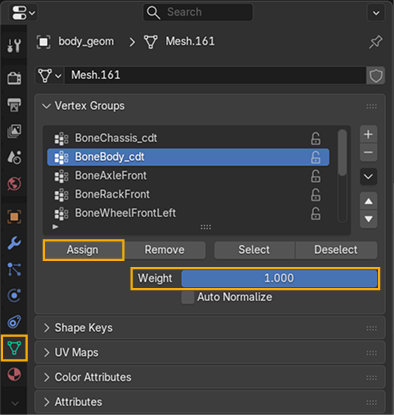
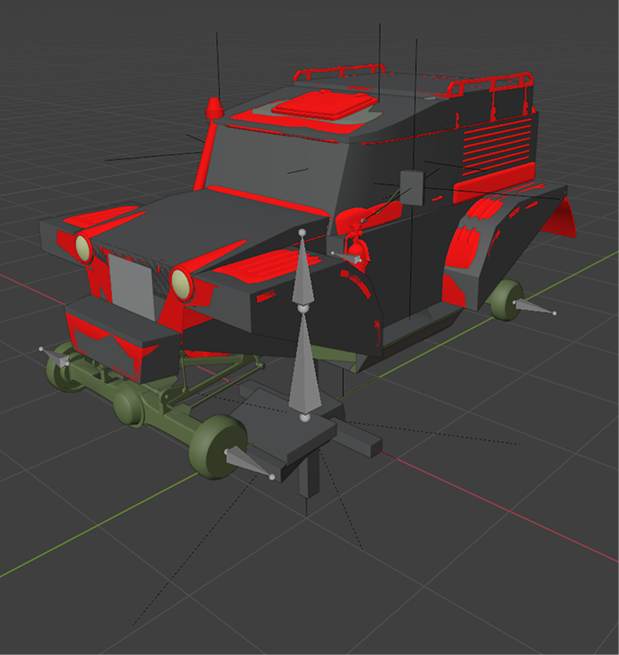
To check that the mesh is fully skinned, switch to the Weight Paint mode. If everything is done correctly, the mesh is completely red: